Craftsman garage door opener repair: 10 Easy Steps
Craftsman Garage Door Opener Repair Guide
Homeowners often rely heavily on the convenience of automatic entry, yet few understand the mechanics until a breakdown occurs. When the largest moving object in your home ceases to function, the need for immediate craftsman garage door opener repair becomes the priority. This comprehensive guide will walk you through every aspect of maintaining and fixing these robust machines. Whether you are dealing with a misaligned sensor, a stripped gear, or a faulty logic board, understanding the nuances of craftsman garage door opener repair is essential for home safety and security.
What Is Craftsman Garage Door Opener Repair?
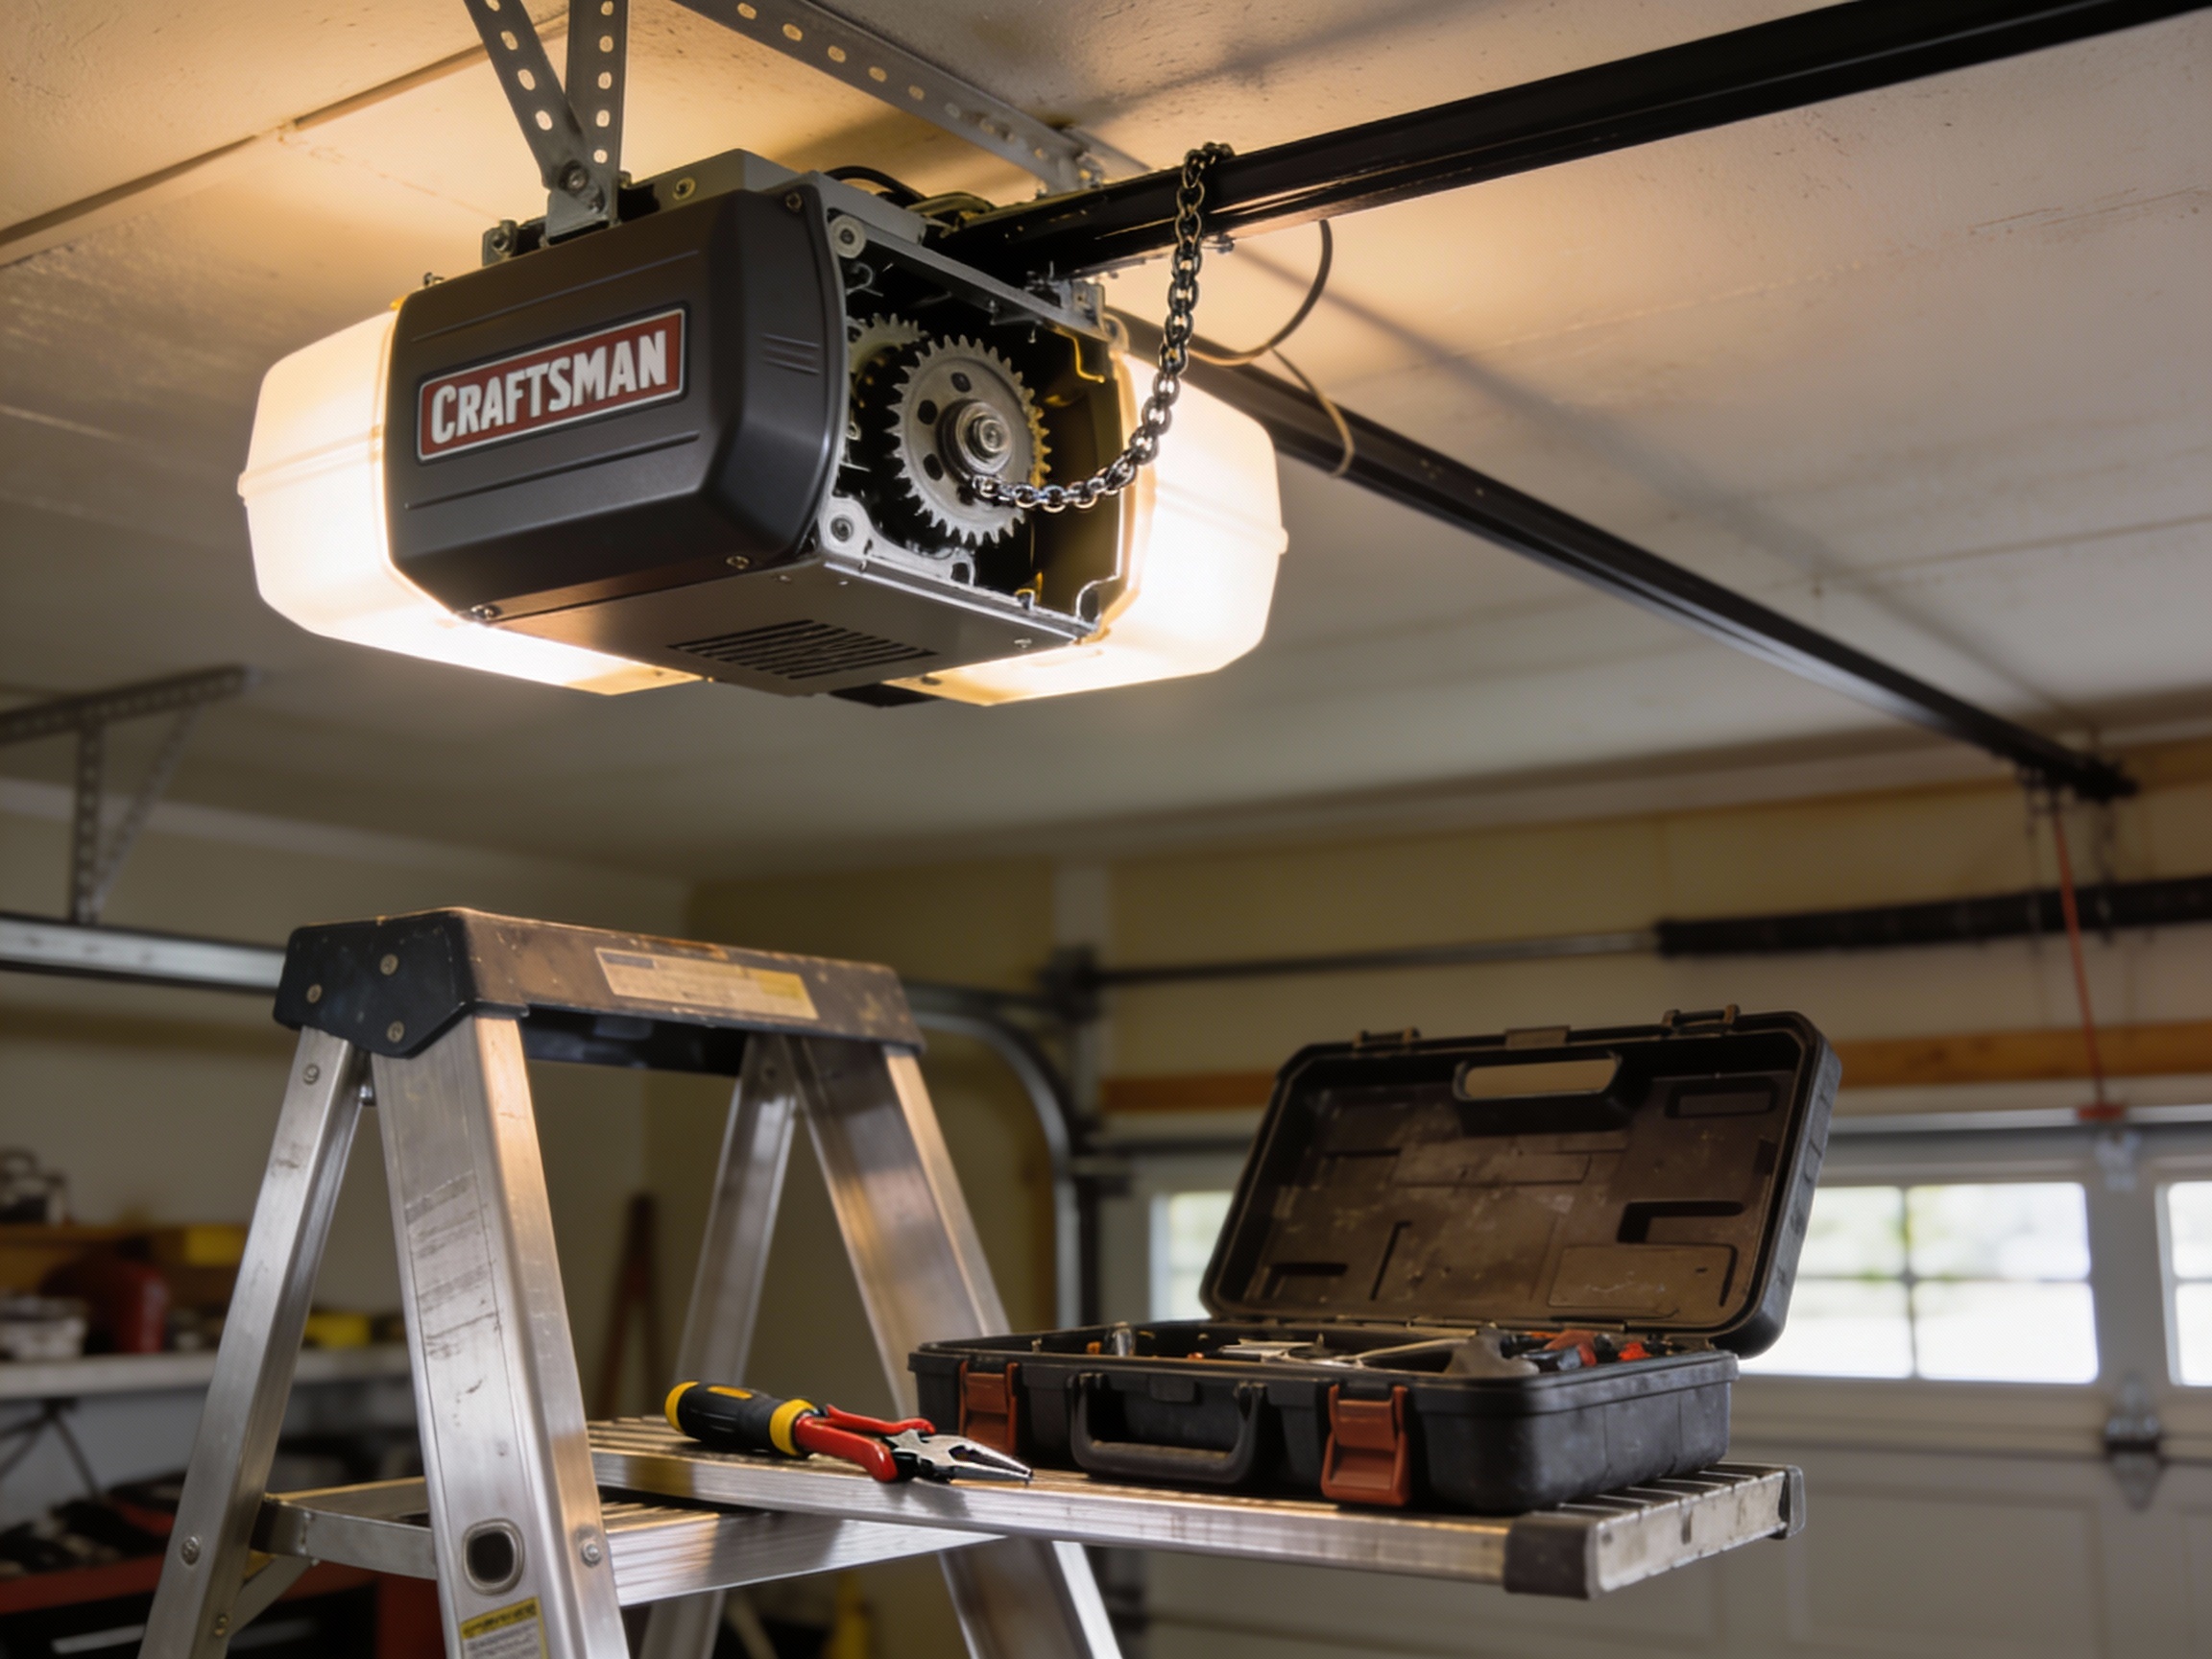
Craftsman garage door opener repair encompasses a wide range of diagnostic and restorative activities aimed at returning your unit to optimal working condition. It is not merely about changing a battery; it involves a systematic approach to identifying mechanical and electrical failures within the system. The Craftsman brand has been a staple in American garages for decades, known for chain-drive, belt-drive, and screw-drive models. Consequently, craftsman garage door opener repair is a specific skill set that requires knowledge of these distinct drive systems.
When we discuss this type of repair, we are looking at the entire ecosystem of the door. This includes the motor head unit, which houses the logic board and gears, the rail system, the trolley, the safety sensors (photo-eyes), and the wall controls. A successful craftsman garage door opener repair often begins with understanding how these components interact. For instance, if the motor runs but the chain does not move, the issue is likely stripped internal gears. If the door reverses immediately after touching the floor, the travel limits likely need adjustment.
Furthermore, craftsman garage door opener repair is distinct because of the availability of parts. Unlike obscure brands, Craftsman units are widely supported, making the definition of repair often synonymous with “component replacement” rather than total unit replacement. It is the process of extending the life of your hardware through targeted intervention. Engaging in craftsman garage door opener repair means you are choosing sustainability and cost-efficiency over the wastefulness of discarding a repairable machine.

How to Do Basic Troubleshooting Safely
Performing craftsman garage door opener repair requires a strict adherence to safety protocols. Before touching any internal components, you must disconnect the power source to prevent electrical shock. This is the golden rule of any appliance repair. Once safety is established, the process of craftsman garage door opener repair moves to visual inspection. You should inspect the tracks for debris, ensure the rollers are seated correctly, and verify that the torsion springs (which should only be adjusted by professionals) are not broken.
To effectively address specific issues, we must look at four critical areas of maintenance:
1. How to repair a craftsman garage door opener
The core of the repair often lies in the motor unit. If you hear a humming noise but see no movement, you likely have a stripped main gear. To fix this, you must unplug the unit, remove the cover, and replace the gear and sprocket assembly. This is a common aspect of craftsman garage door opener repair. You will need to remove the chain or belt from the sprocket, unbolt the motor plate, and swap the worn plastic gears for new ones. Always grease the new gears liberally.
2. How to repair craftsman garage door opener remote
Sometimes the issue isn’t the motor. If the remote fails, first replace the battery. If that fails, the remote may have lost its programming. Locate the “Learn” button on the motor unit (often colored red, orange, yellow, or purple). Press it, then press the button on your remote. If this aspect of craftsman garage door opener repair fails, you may need to check the antenna wire on the motor unit or purchase a compatible universal remote.
3. Craftsman garage door opener service
Routine service is a preventative form of craftsman garage door opener repair. This involves tightening all nuts and bolts on the rail and unit, as vibration loosens them over time. You should also check the manual release handle—the emergency red cord—to ensure it disengages the trolley effectively. Professional service usually includes a force setting test, where the mechanic ensures the door stops if you apply resistance with your hand.
4. Craftsman 1 2 horsepower garage door opener troubleshooting
The 1/2 HP model is the most common unit found in homes. A frequent issue with these is the capacitor failure. If the unit hums and doesn’t move, and the gears look fine, the capacitor might be swollen or leaking. Replacing this cylinder is a cheap and effective craftsman garage door opener repair. Additionally, check the logic board for burn marks if the unit acts erratically or opens by itself.
By systematically addressing these four areas, you can handle 90% of the issues associated with craftsman garage door opener repair without needing a contractor.
How to Find Reliable Replacement Parts
Finding the correct components is a critical step in craftsman garage door opener repair. Because Craftsman openers have been manufactured by Chamberlain for many years, many parts are interchangeable between the two brands, and sometimes LiftMaster as well. However, you must never guess. To ensure successful craftsman garage door opener repair, locate the model number on the chassis of the motor unit. It usually starts with “139.”
Once you have this number, you have several avenues to find parts for your craftsman garage door opener repair project:
-
Sears PartsDirect: This is the traditional source for diagrams and specific part numbers. It is invaluable for identifying the exact screw or bracket you need.
-
Online Marketplaces: Amazon and eBay are flooded with aftermarket gear kits and sensors. When buying here for craftsman garage door opener repair, verify the seller’s rating and read reviews to ensure the plastic quality of gears matches OEM standards.
-
Local Door Dealers: Many local repair shops stock Chamberlain parts. If you need a part immediately to finish your craftsman garage door opener repair, a local dealer is your best bet, though you may pay a premium.
When sourcing parts, prioritize OEM (Original Equipment Manufacturer) parts for the logic board and safety sensors. While aftermarket gears work fine, electronics are sensitive. Using a generic board can complicate your craftsman garage door opener repair and potentially void any remaining warranties.
How to Buy the Right Components
Buying parts for craftsman garage door opener repair is different from finding them. “Finding” is locating availability; “buying” is ensuring compatibility and value. When you are ready to purchase, avoid buying used electronic parts. Logic boards and capacitors have a lifespan, and installing a used board is a bad strategy for long-term craftsman garage door opener repair.
Buying the right lubricant is also part of the process. Never buy WD-40 for craftsman garage door opener repair. You need white lithium grease for the opener screw or rail, and a silicone spray for the rollers. Using the wrong products can attract dirt and cause future failures, necessitating another round of craftsman garage door opener repair sooner than expected.
How Much Does Repair Cost vs Replacement?
This is the most common question homeowners face: is craftsman garage door opener repair worth it, or should I buy a new unit? The answer depends on the age of the unit and the cost of the parts. Generally, if the unit is over 15 years old, replacement might be smarter than craftsman garage door opener repair. However, for minor issues, repair is far cheaper.
A typical gear kit costs between $20 and $40. If you perform the craftsman garage door opener repair yourself, that is your total cost. A professional might charge $150 to $200 for the same job. Compare this to a new unit, which costs $150 to $300, plus another $150 to $250 for professional installation. In this scenario, DIY craftsman garage door opener repair is significantly more cost-effective.
However, if the logic board is fried, the part alone can cost $80 to $120. If you combine a bad logic board with a worn motor, the cost of craftsman garage door opener repair approaches the price of a new, modern unit with WiFi capabilities. Therefore, perform a cost-benefit analysis. If the repair cost is less than 50% of the replacement cost, proceed with the craftsman garage door opener repair.
Why Timely Maintenance Matters
Ignoring the signs that you need craftsman garage door opener repair can lead to catastrophic failure. A noisy door is not just a nuisance; it is a symptom. Grinding noises suggest gears are stripping. If you address this early, you might save the motor. Delaying craftsman garage door opener repair puts excessive strain on the drive system.
Furthermore, safety is paramount. The safety reversal system is designed to prevent the door from crushing a pet or a child. If the sensors are misaligned and you delay craftsman garage door opener repair, you are leaving a dangerous hazard in your home. Regular maintenance ensures these safety features function correctly.
Timely craftsman garage door opener repair also protects your garage door itself. A struggling opener can jerk the door, damaging the panels or throwing the door off the tracks. What started as a $30 opener repair can turn into a $1,000 door replacement. Thus, proactive craftsman garage door opener repair is an investment in the longevity of your entire garage system.
How Long Do Repairs Typically Take?
The time investment for craftsman garage door opener repair varies based on the complexity of the problem and your skill level. For a novice DIYer, replacing the safety sensors might take 30 to 45 minutes. This includes mounting the new eyes, running the wires, and aligning the beam. It is a straightforward entry into craftsman garage door opener repair.
Replacing the main gear and sprocket assembly is more involved. For a first-timer, this specific craftsman garage door opener repair can take 2 to 3 hours. It requires taking the unit down (optional but recommended), removing the casing, disassembling the shaft, and putting it all back together.
However, diagnosing electrical gremlins can take longer. If the issue is intermittent, you might spend days monitoring the door behavior. Professional technicians can usually complete any craftsman garage door opener repair in under an hour because they carry the parts and have performed the task hundreds of times. If time is your most valuable asset, hiring a pro for craftsman garage door opener repair is the most efficient choice.
How to Install New Gears and Sensors
Installing gears is the “heart surgery” of craftsman garage door opener repair. To do this, unplug the unit. Remove the cover. You will see the white nylon gear. If it is shaved or “snowing” plastic shavings, it is time for replacement. Loosen the chain or belt tension. Remove the retaining clip on the bottom of the sprocket. Unbolt the motor assembly to slide the gear out. Insert the new gear, grease it thoroughly, and reassemble. This is the most technical craftsman garage door opener repair you will likely encounter.
Installing sensors is easier but requires precision. The receiving sensor (usually with a green light) and the sending sensor (amber light) must look at each other perfectly. When performing this craftsman garage door opener repair, mount the brackets to the track or wall about 6 inches off the floor. Run the bell wire back to the motor head, ensuring no staples pierce the insulation.
If the lights do not stay solid, the sensors are not aligned. Tweaking the brackets is a delicate part of craftsman garage door opener repair. Use a string line if necessary to verify the path is straight. Once the lights are solid, test the safety reversal system by placing a 2×4 board flat on the ground. The door should reverse when it hits the board.

How to Clean and Lubricate Components
Cleaning is often an overlooked aspect of craftsman garage door opener repair. Dust, cobwebs, and moisture are enemies of electronics. Periodically, you should remove the cover of the motor unit and blow out dust with compressed air. This prevents the logic board from overheating and prevents short circuits, reducing the need for expensive craftsman garage door opener repair.
Lubrication is vital for the rail and trolley. For a screw-drive model, apply white lithium grease directly to the screw threads. For chain drives, a little oil on the chain helps, but do not over-lubricate, as it will drip on your car. Proper lubrication makes the door run quieter and reduces the load on the motor, which is the ultimate preventative craftsman garage door opener repair.
By keeping the system clean, you minimize friction. Friction is the primary cause of gear failure. Therefore, cleaning is not just aesthetic; it is a fundamental part of craftsman garage door opener repair that extends the lifespan of the machine.
What Is the Cost of Professional Help?
If you decide that DIY craftsman garage door opener repair is outside your comfort zone, you need to budget for professional services. Most garage door companies charge a “service call” fee just to come to your house. This ranges from $50 to $100. This fee usually covers the diagnosis but not the parts or labor for the actual craftsman garage door opener repair.
Labor rates vary by region but expect to pay between $75 and $100 per hour. Since most repairs take about an hour, you are looking at a base of roughly $150 plus parts. As mentioned earlier, a capacitor might cost the pro $10, but they may charge you $30. A logic board might be marked up from $80 to $150. Therefore, a professional craftsman garage door opener repair involving a logic board could total $300 or more.
Always ask for a quote upfront. Reputable companies will tell you the cost of the craftsman garage door opener repair before they start work. If the quote is high, ask if the service call fee can be waived if you proceed with the repair. Comparing these costs to the DIY route highlights the financial advantage of learning basic craftsman garage door opener repair skills.
Advantages and Challenges of DIY Repair
The primary advantage of DIY craftsman garage door opener repair is cost savings. You eliminate the labor cost and the part markup. You also gain a sense of accomplishment and a deeper understanding of your home’s mechanics. Additionally, you can perform the craftsman garage door opener repair on your own schedule without waiting for a technician’s appointment window.
However, there are challenges. The biggest challenge is safety. Garage door springs are under immense tension and can kill or injure if mishandled. While craftsman garage door opener repair usually involves the motor and not the springs, working on a ladder always carries risk. Another challenge is misdiagnosis. You might replace a gear when the issue was actually the motor capacitor, wasting money and time on an incorrect craftsman garage door opener repair.
Furthermore, DIY repair voids labor warranties. If a professional fixes it and it breaks again in a month, they usually come back for free. If you do your own craftsman garage door opener repair and it fails, you are back to square one. Despite these challenges, the resources available today—like this guide—make craftsman garage door opener repair accessible to most handy homeowners.

FAQ : Craftsman garage door opener repair
How do I know if my capacitor is bad?
In the context of craftsman garage door opener repair, a bad capacitor often looks swollen or has leaked oil. If the motor hums but does not move, and the capacitor looks visually damaged, it is the likely culprit.
Can I use a LiftMaster remote with my Craftsman opener?
Yes, frequently. Since Chamberlain manufactures both, many remotes are cross-compatible. Checking compatibility charts is a standard step in craftsman garage door opener repair regarding accessories.
Why is my garage door opener light blinking?
The blinking light is a diagnostic code. For effective craftsman garage door opener repair, count the flashes. For example, 5 flashes might indicate a motor overheating issue or a RPM sensor failure.
Is it safe to repair the opener myself?
Craftsman garage door opener repair is generally safe if you unplug the unit and stay away from the torsion springs. The opener itself is low voltage in many areas, but the 120V input must be respected.
Where is the logic board located?
The logic board is located behind the back panel of the motor unit, where the wires for the sensors and wall button connect. Replacing it is a common craftsman garage door opener repair task.
Conclusion
Maintaining a functional garage requires vigilance and a willingness to learn. Craftsman garage door opener repair is not an insurmountable task; it is a logical process of elimination and mechanical adjustment. From troubleshooting the 1/2 HP motor to aligning safety sensors, every step you take ensures the security and efficiency of your home.
By following the guidelines for finding parts, understanding costs, and prioritizing safety, you can master craftsman garage door opener repair. Whether you choose to tackle the gears yourself or hire a professional, the knowledge you have gained here ensures you will make informed decisions. Keep your system lubricated, listen for changes in operation, and address issues immediately. With proper care and timely craftsman garage door opener repair, your trusted opener will continue to lift the weight of your day for years to come.
🔧 Other Resources
• YouTube Video – Video demonstrating common troubleshooting steps for garage door opener issues.
• YouTube Video – Video explaining diagnostic checks and fixes for garage door opener malfunctions.
• Spectrum Overhead Door – Informational article outlining common Craftsman garage door opener problems and solutions.
• Reddit DIY Community – Community discussion sharing real-world experiences with Craftsman garage door opener issues.
🔎 Other Helpful Articles
• Garage Door Windows – Informational article explaining types, styles, and functions of garage door windows.
• Linear Garage Door Opener – Educational overview describing Linear garage door openers and their features.
• Garage Door Repair Chicopee – Local service-focused article explaining garage door repair needs in Chicopee.