Garage door opening framing: Powerful Fixes
Garage door opening framing is one of those construction details that looks straightforward until you try to hang a real door, run tracks, and keep everything square for years. Done right, it creates a strong, plumb, and stable “picture frame” that supports loads above the opening and gives installers the exact clearances they need for smooth operation. Done wrong, it can cause binding, cracked drywall, uneven gaps, and expensive rework.
This guide breaks down garage door opening framing in plain English: what it is, how to find and measure it, how much it costs, why it matters, how long it takes, and how to install it correctly. Along the way, you’ll learn the framing members that actually carry the load—especially headers, jack studs, and king studs—and how rough openings differ from finished openings. (For basic framing-member roles like jack and king studs, see how a header bears on jack studs while king studs run full height.)
What is garage door opening framing?
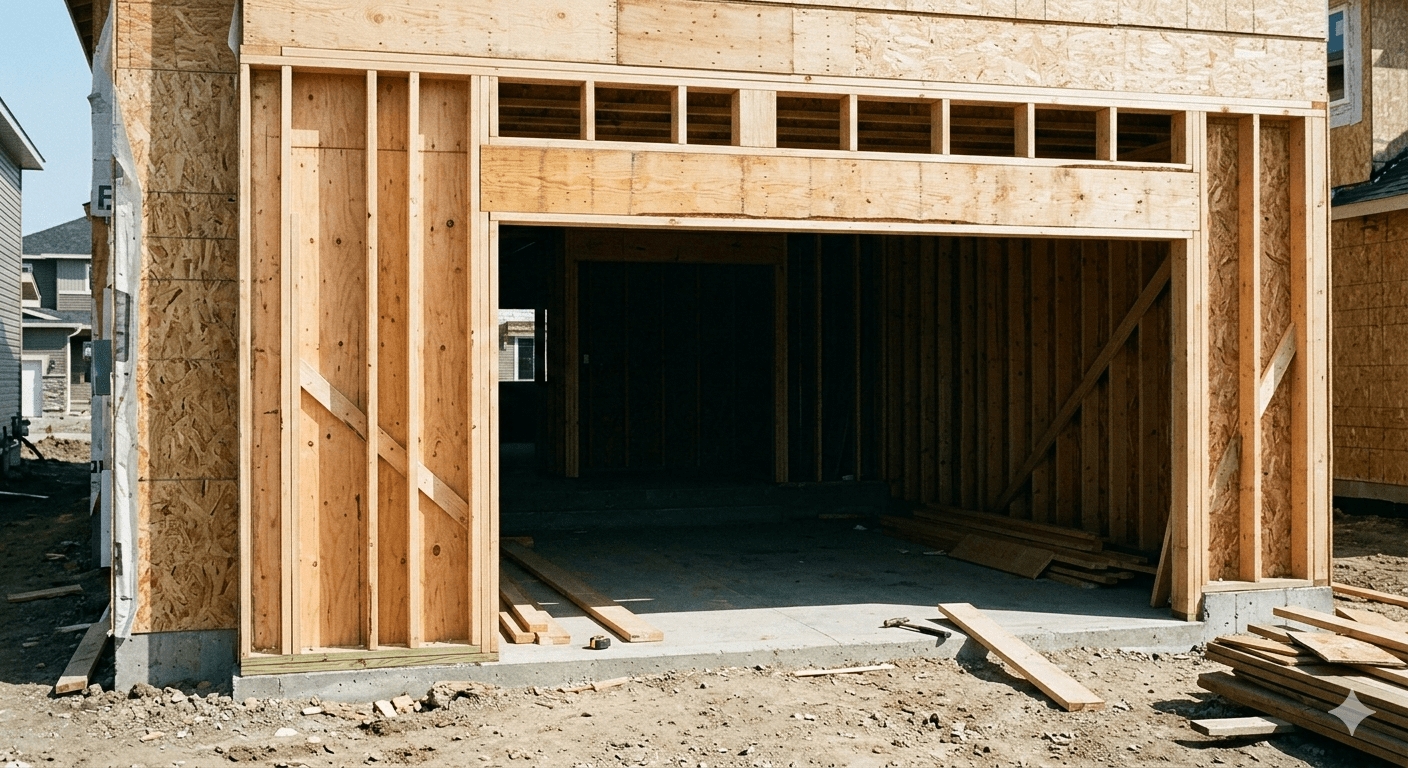
At its core, garage door opening framing is the structural and dimensional layout that forms the opening in a framed wall where an overhead garage door will be installed. It includes the vertical side supports and the horizontal header area above the opening, which transfers loads to the sides of the opening through load-bearing studs. In typical residential wood framing, the header rests on jack (trimmer) studs, while king studs run floor-to-ceiling beside them to stabilize the opening and support the top plate.
You’ll also hear two terms that matter when talking about garage door opening framing: rough opening and finished opening. A rough opening is the open space that’s intentionally a little larger than the door to allow room for the door system and its components, while a finished opening is what remains after jamb materials and related trim are installed.
Why garage door opening framing matters
Garage door opening framing matters because the opening is usually one of the largest interruptions in a wall’s stud layout, and that interruption changes how loads move down to the foundation. The header must be properly supported at both ends, and jack studs are specifically used to carry that header load.
It also matters for performance: overhead doors need consistent side clearance, level bearing points for tracks, and a square opening so seals compress evenly. Even small errors in garage door opening framing can translate into noisy operation, premature hardware wear, and visible gaps at the perimeter.
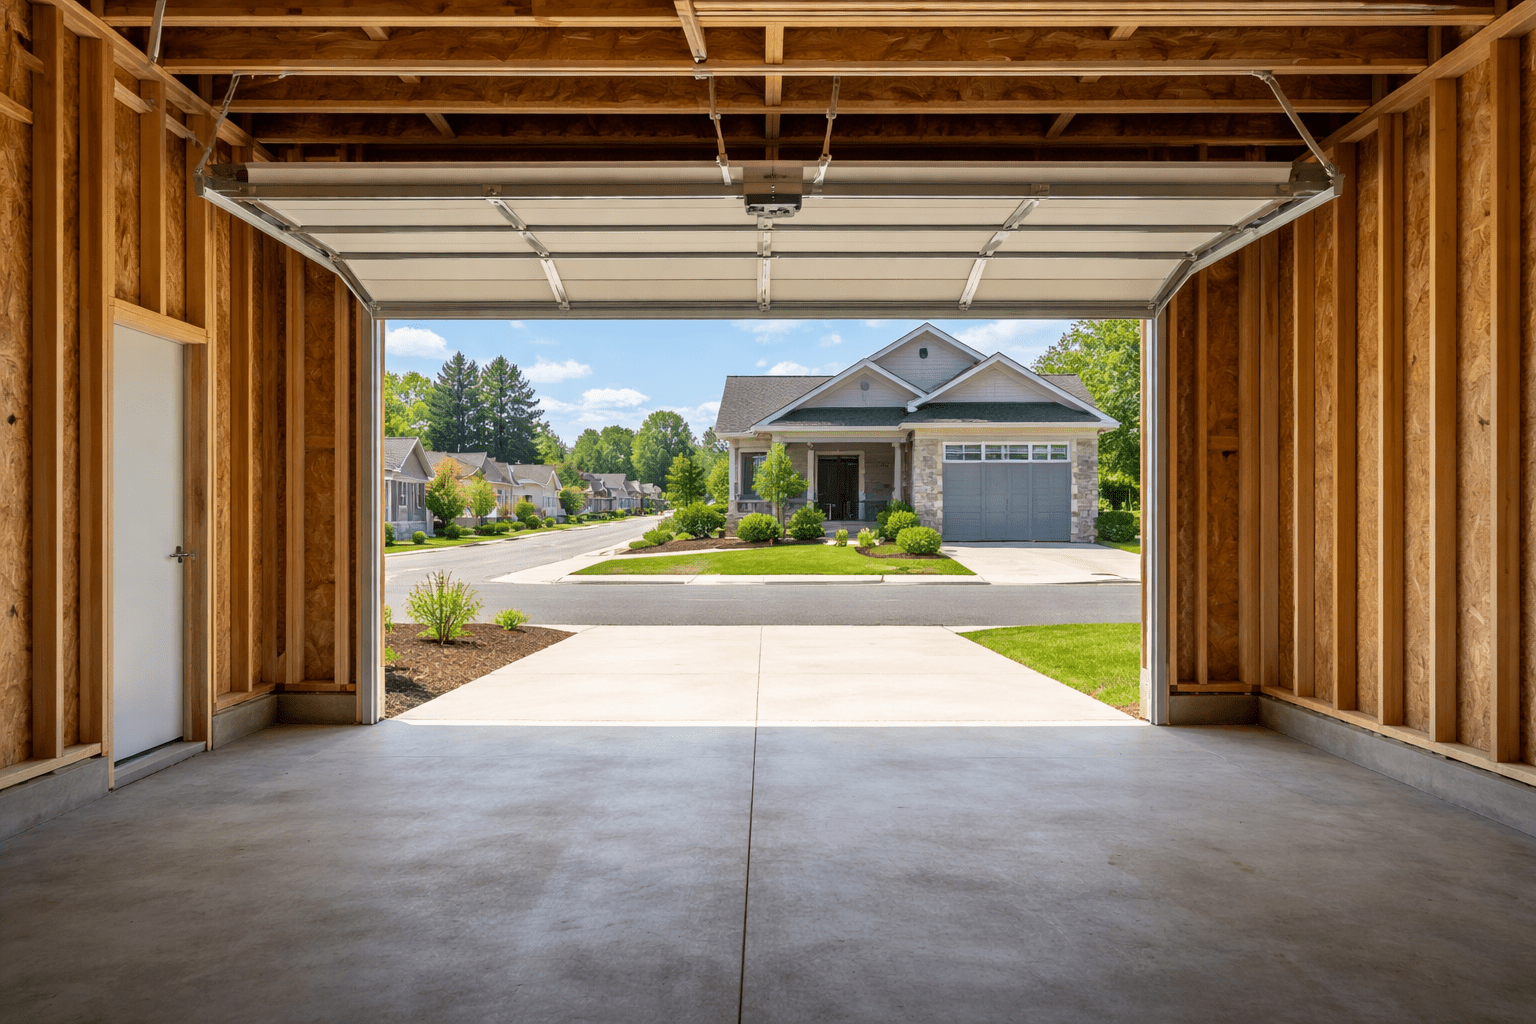
How to find the garage door opening framing in your garage
To find garage door opening framing in an existing garage, start inside and look for the structural “goal post” shape: the horizontal header area across the top and the vertical studs on each side. The studs immediately supporting the header are typically jack studs, and the full-height studs beside them are king studs.
If the wall is finished, use clues: the header line often corresponds with a drywall seam or a thicker band above the door, and king/jack stud locations often align with fastener lines or trim edges. When in doubt, a stud finder and small inspection holes can confirm where the load-bearing members actually sit.
How to measure and verify the rough opening
Accurate measurement is the foundation of garage door opening framing, because the door size, track layout, and jamb installation depend on it. One practical guideline used in garage door framing guidance is that the rough opening height should be about 1.5 inches taller than the door height, and the rough opening width about 3 inches wider than the door width.
Measure the width between framing members at several points (top, middle, bottom) and use the smallest measurement to avoid surprises when the door and jambs go in. This “measure in multiple places and record the smallest” approach is widely recommended for rough openings because walls aren’t always perfectly straight.
How much does garage door opening framing cost?
The cost of garage door opening framing depends on whether you’re framing from scratch, resizing an opening, or repairing a compromised frame. Material costs typically include studs, header lumber (or engineered lumber), fasteners, and possibly jamb material; labor varies widely by region and complexity.
A simple new rough opening in non-complex framing may be far cheaper than modifying a load-bearing wall where the header size changes and temporary supports are required. If local code or engineering calls for multiple jack studs on each side for a large opening, labor and lumber both increase; for example, framing guidance notes that larger openings may require two or more jack studs depending on opening width and header load.
How long does garage door opening framing take?
Time is mostly driven by access and scope. In open framing (new construction or exposed studs), garage door opening framing can be laid out and built relatively quickly, often in the span of a workday for an experienced crew, assuming materials are on site and the header plan is already set.
If the wall is finished, or if you’re changing the opening size, it can take longer because demolition, temporary shoring, careful measurement, and inspection steps add time. If you’re coordinating with a door installer, plan your schedule so the framing is complete, square, and inspected before the door crew arrives.
How to install garage door opening framing (step-by-step)
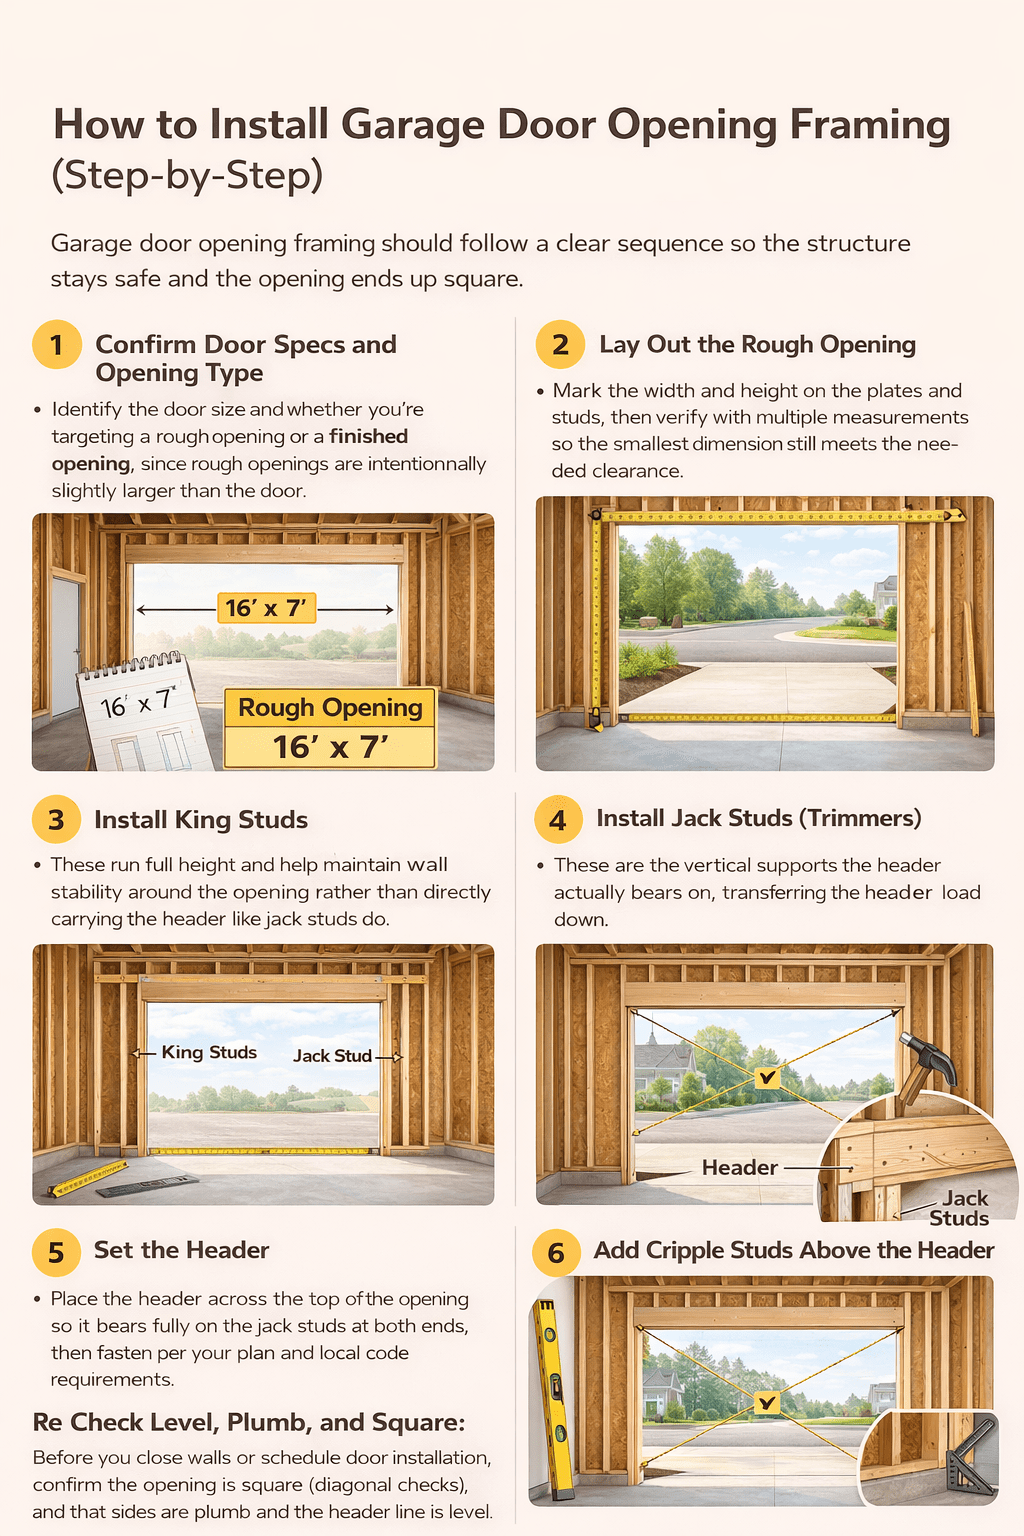
Garage door opening framing should follow a clear sequence so the structure stays safe and the opening ends up square.
Confirm door specs and opening type: Identify the door size and whether you’re targeting a rough opening or a finished opening, since rough openings are intentionally slightly larger than the door.
Lay out the rough opening: Mark the width and height on the plates and studs, then verify with multiple measurements so the smallest dimension still meets the needed clearance.
Install king studs: These run full height and help maintain wall stability around the opening rather than directly carrying the header like jack studs do.
Install jack studs (trimmers): These are the vertical supports the header actually bears on, transferring the header load down.
Set the header: Place the header across the top of the opening so it bears fully on the jack studs at both ends, then fasten per your plan and local code requirements.
Add cripple studs above the header as needed: These short studs fill the space above the opening for sheathing/drywall attachment and to restore stud layout.
Re-check level, plumb, and square: Before you close walls or schedule door installation, confirm the opening is square (diagonal checks), and that sides are plumb and the header line is level.
If you’re also installing jamb components, some garage door framing instructions recommend starting with the head jamb so the side jambs can sit flush, then adding side jambs and center bracket framing used by installers for spring hardware attachment.
Should I DIY garage door opening framing or hire a pro?
DIY garage door opening framing can make sense if the wall is clearly non-load-bearing (rare at garage fronts), the framing is exposed, and you’re comfortable with layout, fasteners, and squaring an opening. But when the opening affects structural loads, a pro (or an engineer, depending on local rules) reduces risk because the header sizing, bearing, and stud requirements have real safety implications.
Hiring a pro also helps when you’re widening an opening, replacing a header, or correcting a racked opening that’s already causing door problems. Remember: jack studs are intended to support the header load, and incorrect support can lead to sagging or movement over time.
Can I change the opening size after framing?
Yes, but changing size after garage door opening framing is complete is usually a “structural modification,” not a trim tweak. Enlarging often requires removing studs, installing a new header, and reworking jack and king studs so the header still bears correctly.
Shrinking an opening is typically easier, but it still needs careful layout so the finished opening matches the door system you plan to install. In all cases, confirm your door manufacturer’s requirements and local code expectations before cutting.
Advantages and challenges
Garage door opening framing has clear advantages when it’s done with precision:
Better door operation: A square, plumb opening supports smoother travel and better sealing.
Structural reliability: Proper headers bearing on jack studs transfer loads correctly.
Cleaner finishes: Straight jamb lines and consistent reveals make trim and drywall easier.
Common challenges include:
Header and stud sizing uncertainty: Larger openings may require multiple jack studs and stronger headers, which can vary by design loads and local code interpretation.
Out-of-square slabs or walls: Concrete floors and existing framing can be out of level, forcing you to choose the smallest measurement and correct with shimming or rework.
Hardware clearance: Rough openings are slightly larger than the door to make room for parts and operation, so tight framing can create installation conflicts.
Garage door opening framing Special mini section
The fastest way to avoid headaches is to treat garage door opening framing like a precision layout job, not just “building a hole in a wall.” Your goal is a square opening with solid bearing under the header, clean surfaces for jambs, and enough room for tracks and springs. Rough openings are meant to be slightly larger than the door so the system can be installed and adjusted.
How to framea garage door opening 18-7
For an 18×7 door, confirm the manufacturer’s rough opening target first, then plan the header and stud package for the larger span.
Framing garage door opening
Install king studs full height, then jack studs inside them so the header has proper bearing and load transfer.
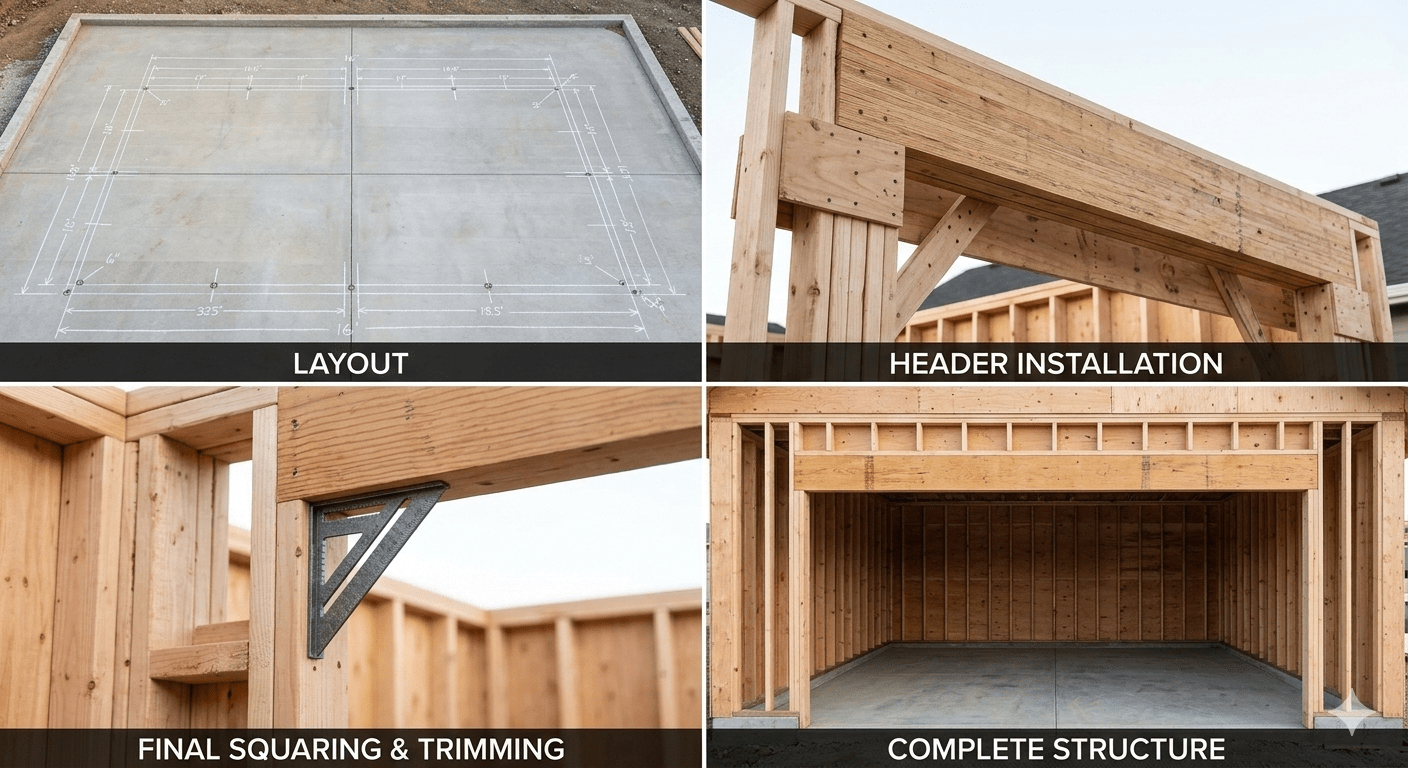
Garage door framing diagram
Sketch a simple diagram labeling king studs, jack studs, header, top/bottom plates, and the rough opening dimensions before you cut.
Garage door framing detail pictures
Take pictures during layout, header installation, and final squaring; they help with inspections and troubleshooting later.
FAQ : Garage door opening framing
What’s the difference between rough and finished openings?
Rough openings are the open space slightly larger than the door to allow room for the system, while finished openings are the remaining space after framing/jamb work is installed.
Do I always need jack studs and king studs?
Jack studs support the header, and king studs run full height beside them to reinforce the opening and support the top plate area.
How do I measure so I don’t order the wrong door?
Measure the opening width in multiple places (top, middle, bottom) and use the smallest measurement, since walls can be out of straight.
Can bad framing cause my door to bind or leak?
Yes—if the opening isn’t plumb, level, and square, door tracks and seals may not align correctly, and operation can become noisy or uneven.
Conclusion
Garage door opening framing is the structural and dimensional backbone of a reliable overhead door installation, combining correct load support (header bearing on jack studs) with precise measurement for a square, workable opening. If you measure carefully, understand rough versus finished openings, and build the stud-and-header assembly correctly, you’ll set up the door for smooth movement, better sealing, and fewer repairs.
Other Resources
YouTube – Garage Door Framing Video – Video demonstrating the framing process for installing a garage door opening.
Doors Done Right – Garage Door Framing Guide – Informational guide explaining proper framing for garage door rough openings.
Reddit – Garage Door Framing Rough Opening Discussion – Community discussion sharing advice about framing a garage door rough opening.
Other Helpful Articles
Slide Garage Door – Article explaining sliding garage door systems and installation basics.
Change Code on Garage Door Keypad – Guide describing steps to change a garage door keypad access code.
Open Garage Door with Broken Spring – Informational article outlining safe ways to open a garage door when the spring is broken.