Garage Door Track: 1 Easy Ways to Boost Safety
Garage Door Track: 9 Proven Secrets for Longevity
The garage is often the primary entrance for modern homeowners, yet the mechanisms that allow this heavy barrier to function are frequently overlooked. At the heart of this system lies the garage door track, a critical component that guides the rollers and ensures the door travels smoothly from a vertical closed position to a horizontal open one. Without a properly aligned and maintained track, even the most expensive opener or insulated door panels become useless. Understanding the intricacies of this metal guide is essential for any homeowner who values safety, security, and the long-term value of their property.
A functioning garage door track system is a marvel of simple engineering. It bears the weight of the door as it transitions through gravity-defying angles, often multiple times a day. When this system fails, it can result in catastrophic damage to the door itself or, worse, injury to those nearby. This comprehensive guide will explore every facet of the track system, from identifying steel gauges to mastering the delicate art of realignment. Whether you are a DIY enthusiast looking to perform a weekend tune-up or a homeowner trying to determine if a professional repair is necessary, this article serves as your ultimate resource.
What Is a Garage Door Track?
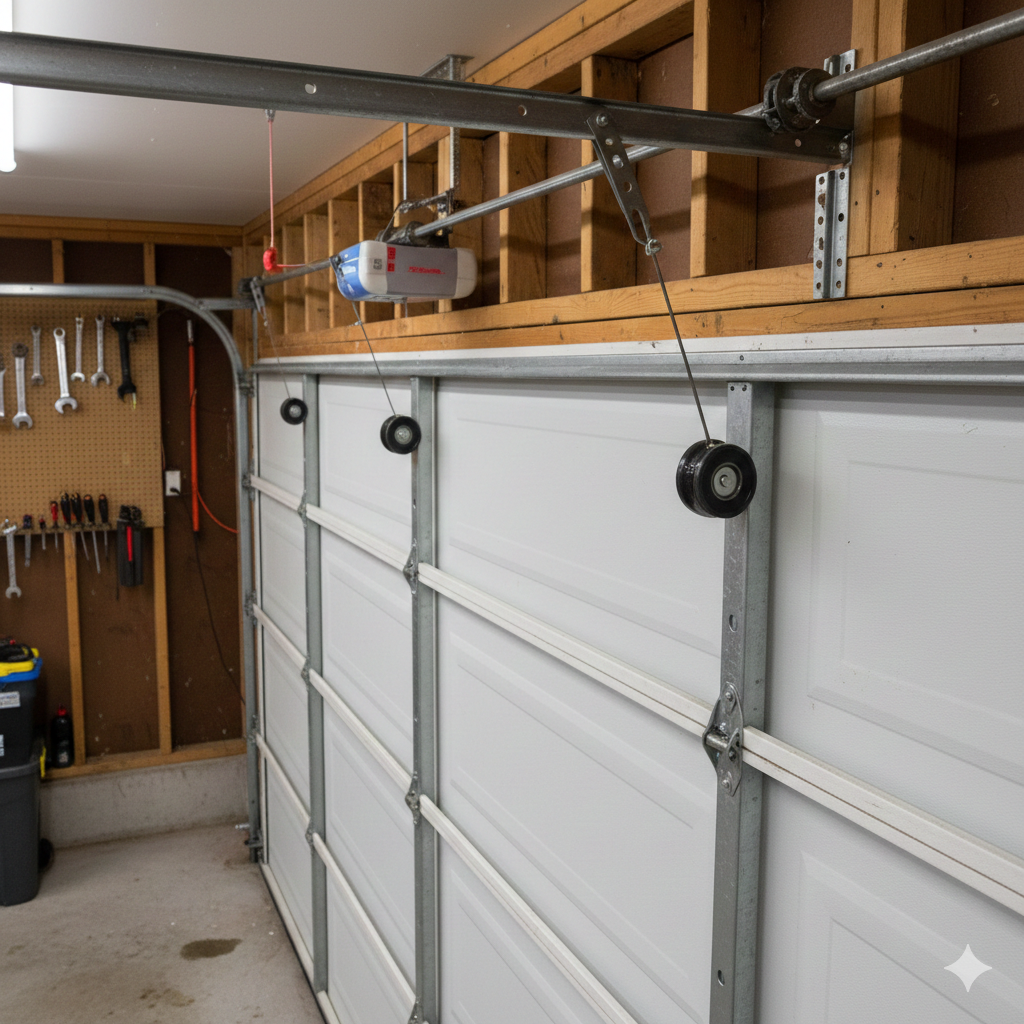
A garage door track is a set of metal rails, typically made from galvanized steel, designed to house the rollers attached to the sides of a garage door. These tracks act as a roadmap for the door, dictating its path of travel. In a standard sectional door setup, there are vertical tracks attached to the door jambs and horizontal tracks suspended from the ceiling. A curved section, simply called the curve or radius, connects these two straight pieces, allowing the door to transition from standing up to lying flat overhead.
The anatomy of a garage door track is more complex than it appears at first glance. The vertical sections often feature graduated slots or brackets that push the door tight against the jamb when closed to create a weather-tight seal, a feature known as the “wedge effect.” The horizontal sections are reinforced with angle iron to prevent sagging under the weight of the door when it is fully open. The steel used is categorized by gauge—the lower the gauge number, the thicker and stronger the steel. Residential tracks typically range from thin 0.055-inch steel for budget doors to robust 0.083-inch steel for premium installations.
Furthermore, the width of the garage door track varies based on the application. The most common residential size is the 2-inch track, which accommodates standard 2-inch rollers. Industrial or heavy commercial doors often utilize a 3-inch track system to support the immense weight of larger panels. Understanding these specifications is the first step in diagnosing issues or planning a replacement. If you install a heavy wood carriage-house door on a thin, low-gauge track, the metal will eventually warp or buckle, leading to a dangerous failure.

Types of Garage Door Tracks Available
Not all garages are built the same, and consequently, the garage door track industry has developed several configurations to solve unique architectural challenges. The most ubiquitous type is the Standard Radius track. This system requires about 15 inches of headroom (the space above the door opening) and features a gentle 15-inch curve. It is the industry standard because it is reliable, easy to manufacture, and fits most suburban homes built in the last few decades.
However, many older homes or basements with low ceilings cannot accommodate a standard curve. For these situations, the Low Headroom garage door track is the solution. This intricate system often uses a double-track design: the top section of the door rides in an upper track while the rest of the door follows a lower track. This geometry allows the door to turn quickly and sit closer to the ceiling, requiring as little as 10 inches of clearance. While effective, the low headroom track is more difficult to install and can be slightly noisier due to the complex movement of the top rollers.
On the opposite end of the spectrum is the High Lift garage door track. Popular in workshops and homes with vaulted ceilings, this configuration extends the vertical track further up the wall before curving back. This keeps the door closer to the high ceiling, freeing up valuable wall space for storage shelves or car lifts. For strictly vertical applications, such as in warehouses, a Vertical Lift track eliminates the curve entirely, sending the door straight up. Finally, Roof Pitch tracks are custom-angled to follow the slope of a cathedral ceiling, offering an aesthetic appeal that keeps the mechanicals hidden against the rafters.
How to Find the Correct Track Specs
Identifying the correct garage door track for your home involves precise measurement and observation. You cannot simply walk into a hardware store and grab a generic rail; you must match the radius, thickness, and length to your specific door. The most critical measurement is the radius of the curve. To find this, look at the curved section of your track. Measure the distance from the vertical rail to the horizontal rail at the point where they would intersect if they were straight lines. A 12-inch radius and a 15-inch radius are the most common, but misidentifying this will cause your door panels to bind or separate during operation.
Another method to find the right garage door track specs is to locate the manufacturer’s label on the door itself. Brands like Clopay, Amarr, or Wayne Dalton often use proprietary hole patterns or steel grades. If the label is worn off, you will need to measure the width of the track channel. Is it 2 inches or 3 inches? Next, measure the length of the vertical track. Standard heights are usually 6 feet 4 inches, 7 feet, or 8 feet. Installing a 7-foot vertical track on an 8-foot door will prevent the door from opening fully, leaving the bottom panel hanging in the header.
It is also vital to assess the gauge of your current steel. You can use a caliper to measure the thickness of the metal. If you are replacing a damaged section, it is highly recommended to upgrade to a lower gauge (thicker steel) if possible, as this adds rigidity to the entire system. Finding these specific parts often requires visiting a specialized garage door supply house rather than a general big-box store, as the latter typically only stocks complete kits rather than individual track components.
How to Buy Quality Replacement Tracks
When you are ready to buy a garage door track, quality should be your primary metric. Cheap, imported tracks often use recycled steel with poor galvanization, leading to premature rusting and bending. Look for tracks that are “hot-dipped galvanized.” This process coats the steel in a thick layer of zinc that bonds chemically with the metal, providing superior rust protection compared to a simple surface spray.
You have two main options for purchasing: local dealers or online retailers. Local overhead door companies will often sell parts to the public. The advantage here is that you can bring your old, damaged piece of garage door track to the counter and ensure an exact match. They can also cut tracks to custom lengths if your floor is uneven or your header is non-standard. However, you may pay a premium for this convenience and expertise.
Online retailers offer a vast selection and often lower prices, but the shipping of long steel rails can be expensive and prone to damage. When buying online, ensure the seller provides detailed schematics of the hole patterns and radius curves. Check for reviews specifically mentioning the packaging; a bent track delivered to your doorstep is useless. Always buy tracks in pairs if your door is older; replacing just one side can lead to uneven wear on the rollers and potential alignment issues down the road.
What Is the Cost of Garage Door Track Systems?
The cost of a garage door track varies significantly based on the type, gauge, and complexity of the system. For a standard residential 7-foot door, a pair of vertical tracks typically costs between $100 and $200. Horizontal tracks are generally more expensive due to their length and the inclusion of the curved radius, ranging from $150 to $300 per pair. If you require a specialized Low Headroom kit, expect to pay upwards of $400 for the complete hardware set due to the double-track design and specialized brackets.
Labor is another major factor if you are not installing it yourself. A professional technician will charge between $125 and $250 for the service call and labor to replace a garage door track. This usually includes realigning the door and tensioning the springs, which is a value-added service that ensures safety. Totaled up, a full track replacement performed by a pro can cost between $400 and $700 depending on your region and the specific challenges of your garage structure.
It is important to note that cost should not be the only deciding factor. Investing in a heavy-duty garage door track (like a 12-gauge commercial grade) for a high-traffic residential garage can save money in the long run. Thicker tracks resist bending from minor impacts—like a bicycle handle or a car bumper—much better than standard builder-grade tracks. The initial extra cost of $50 to $100 for heavy-duty hardware pays dividends in longevity and reduced service calls.
How to Install a Garage Door Track Safely
Installing a garage door track is a task that balances mechanical skill with strict safety protocols. The most dangerous aspect of this job is the tensioned springs. Before you unbolt any track that is connected to the spring system (specifically the vertical flags or horizontal angles), you must ensure the door is secure and the tension is managed. For most homeowners, it is safer to replace tracks while the door is in the closed position, but even then, cables can be under extreme tension.
To begin the installation, you must first remove the old track. Start by locking the door down or using vise grips on the unaffected track to prevent the door from shooting up. Unbolt the vertical track from the jamb brackets. When installing the new garage door track, loose assembly is key. Bolt the track to the jamb brackets but do not tighten them fully. This “floating” installation allows you to adjust the distance from the door to the jamb (the spacing) before locking it down. The goal is to have the track parallel to the door with about half an inch of spacing to allow the rollers to float without binding.
Alignment is the final and most critical step. A vertical track must be plumb (perfectly vertical). Use a high-quality 4-foot level to check this. The horizontal track must be level and square with the opening. If the two horizontal tracks are not parallel, the door will fall out of the tracks as it opens. Once everything is aligned, tighten all lag screws and bolts. Manually lift the door slowly to check for any binding points in the garage door track before re-engaging the electric opener.
How to Clean and Maintain Your Tracks
Maintenance of the garage door track is surprisingly simple but often done incorrectly. The most common mistake homeowners make is lubricating the tracks with grease or oil. Never grease a garage door track. Grease is sticky; it traps dust, hair, and grit, creating a grinding paste that wears down rollers and gums up the movement. The track is designed to be dry and clean. The rollers are the only moving part; the track is merely a static guide.
To clean the garage door track properly, you need an automotive brake cleaner or a simple household degreaser and a rag. Wipe the inside of the curved and straight sections thoroughly to remove old grease, spiderwebs, and industrial grime. For stubborn buildup, an old toothbrush works wonders in the crevices. Once the track is clean and dry, it should feel smooth to the touch. If you live in a coastal area with salt air, wiping the tracks down with a little WD-40 (and then wiping it all off) can help prevent rust, but do not leave a wet film.
Inspect the mounting brackets and bolts annually. The vibration of the door can rattle the lag screws loose over time. A loose garage door track will vibrate excessively, causing noise and eventual misalignment. Take a socket wrench and gently tighten every bolt you see holding the track to the wall. This simple ten-minute task can add years to the life of your garage door system.

Advantages and Challenges of Track Systems
The primary advantage of a sectional garage door track system is space efficiency. Unlike swing-out doors or sliding barn doors, a tracked overhead door uses dead space near the ceiling, leaving the floor clear. This design maximizes the usable square footage of the garage. Furthermore, the track system provides excellent security. When the door is engaged in the vertical track, it is locked against the jambs, making it incredibly difficult for intruders to force open from the outside.
However, challenges exist. The garage door track is exposed and vulnerable to damage. A slight bump from a car tire or a lawnmower can dent the vertical rail. Even a small dent can cause the rollers to catch, creating a “hiccup” in the door’s movement that puts stress on the opener. Another challenge is thermal expansion. In climates with extreme temperature swings, the steel tracks and the wood or metal framing of the house can expand and contract at different rates, potentially throwing off the alignment and requiring seasonal adjustments.
Rust is the enemy of any garage door track. While galvanization helps, tracks in humid climates or those exposed to road salt brought in by cars will eventually corrode. Once rust creates pitting on the track surface, the rollers will act like sandpaper, destroying the smooth finish. Regular inspection and immediate treatment of surface rust with steel wool and a clear inhibitor are necessary to mitigate this challenge.
Essential Troubleshooting and Repair Guide
When your door fails, it often requires immediate attention. This section covers four specific critical topics related to getting your system functional again.
Garage Door Track Repair
Repairing a bent track is possible if the damage is minor. If the lip of the track is bent inward, you can use a pair of locking pliers to gently bend it back into shape. For a dent in the curved section, a ball-peen hammer and a block of wood can be used to smooth out the metal. However, if the track is cracked or the steel is fatigued (showing white stress marks), garage door track repair is not recommended; replacement is the only safe option.
How to Get Garage Door Back on Track
If your door has jumped the rails, safety is paramount. First, disconnect the electric opener by pulling the red emergency release cord. This allows you to move the door manually. You will need a helper for this. Open the track by loosening the bolts on the jamb brackets slightly. This widens the channel, allowing you to manipulate the rollers. Carefully guide the wheels back into the channel. This process of learning how to get garage door back on track requires patience; forcing it will only bend the track further or damage the rollers.
How to Put Garage Door Back on Track
Once the rollers are seated, you must re-tighten the track hardware. Check the spacing; the track should not press tight against the rollers. There should be a small amount of play. To finish the task of how to put garage door back on track, lift the door manually to its fully open position and then lower it slowly. Listen for scraping sounds. If the door moves freely, re-engage the opener. If it binds, you likely need to adjust the vertical alignment again.
How to Fix Garage Door Off Track
A door often comes off track because of a loose cable or an obstruction. Check the cables on the drums; if they are loose and spooled messily, do not touch them—call a pro. If the cables are fine, look for debris. A broom handle or a stone in the track can derail a roller. How to fix garage door off track situations often ends with prevention: ensuring the tracks are clear and the bolts are tight so the rails don’t widen and let the rollers escape.
Common Problems and Noise Solutions
A noisy garage door is often blamed on the opener, but the garage door track is a frequent culprit. A popping sound usually indicates a track that is too tight against the door, squeezing the rollers. A grinding sound suggests that sand or dirt is in the track, or the track is misaligned, causing the metal roller shaft to rub against the track edge.
To silence these noises, check the alignment. The vertical track should have a slight angle away from the jamb as it goes up, preventing the door from binding against the weatherstripping. If the garage door track is perfectly straight but the noise persists, check the joints where the vertical and horizontal tracks meet. If this joint is uneven, the rollers will “clunk” every time they pass over it. Loosen the connecting bolts and align the two sections perfectly so your finger runs smoothly across the seam.
Another common issue is “track spread.” Over time, the weight of the door can push the horizontal tracks outward. If the tracks spread too wide, the rollers can fall out. To fix this, measure the distance between the tracks at the wall and at the rear of the garage. These measurements should be identical (or the rear slightly wider by no more than an inch). If they are wide, push the garage door track back into position and tighten the support angles.
Safety Precautions and Final Thoughts
Working on a garage door track involves inherent risks. The door itself can weigh several hundred pounds. Always work with the door in the down position when possible, or securely clamped with locking pliers if it must be open. Never remove the bottom roller bracket while the spring is under tension; this bracket is connected to the lift cable and can cause severe injury if released.
Ultimately, the garage door track is the unsung hero of your garage. It demands little but gives much in return. By keeping it clean, aligned, and tightly bolted, you ensure the safety and convenience of your home access. Whether you are performing a simple cleaning or a complex realignment, respecting the physics of the system is key. If you are ever unsure about a repair, especially involving high-tension cables or springs, contacting a professional is the wisest investment you can make.

Frequently Asked Questions
How often should I clean my garage door track?
You should clean your tracks at least twice a year. If you live in a dusty environment or near the coast, increasing this to once every three months will prevent buildup and corrosion.
Can I use WD-40 on my garage door track?
You can use WD-40 for cleaning to remove rust or grime, but you must wipe it away completely. Do not leave it as a lubricant. For actual lubrication of rollers (not the track itself), use a silicone spray or white lithium grease.
Why is my garage door track vibrating so much?
Excessive vibration is usually caused by loose mounting hardware. Check every bolt connecting the track to the wall brackets and the ceiling. Also, inspect the rollers; if they are worn or flat-spotted, they will cause the track to shake.
Is it safe to replace a vertical garage door track myself?
It can be safe if the door is closed and you do not touch the bottom brackets or the spring system. However, the vertical track guides the door, so precise alignment is required. If you are not comfortable with levels and measurements, hire a pro.
What is the difference between a 2-inch and 3-inch track?
A 2-inch track is standard for residential homes. A 3-inch track is used for heavier commercial doors or oversized custom wood residential doors. The 3-inch version is made of thicker steel and supports more weight.
Conclusion
Your home’s functionality relies on many moving parts, but few are as vital as the garage door track. From the heavy-gauge steel that supports the door’s weight to the precise curves that allow for overhead clearance, this system is a masterpiece of industrial design adapted for residential use. By understanding the types of tracks available, the costs associated with repair, and the critical importance of regular maintenance, you can extend the life of your garage door significantly.
Remember that a clean, dry, and aligned garage door track is a happy one. Avoid the common pitfalls of over-lubrication and neglect. If you encounter serious issues like a door coming off the rails, refer to the troubleshooting steps outlined above, but always prioritize your physical safety. With the right care, your tracks will provide years of silent, smooth, and reliable service, welcoming you home safely every single day.
Other Resources
Explore these reliable sources to learn more about garage door tracks, replacement parts, and track types:
Home Depot – Garage Door Parts – Wide selection of garage door tracks, hardware, and replacement components.
Amazon – Garage Door Vertical Track Replacement – Popular vertical track replacement option with customer reviews.
Arrow Tru-Line – Types of Garage Door Tracks – Clear explanation of standard, low-headroom, and high-lift track systems.
🔎 Other Helpful Articles
Garage Door Springs – Guide to spring types, safety, and replacement.
Garage Door Sensor Fix – Troubleshooting common sensor problems and fixes.